 The Cisco Linksys WRT54G Wireless Router has become very popular recently for their ability to upgrade the firmware with DD-WRT. But what if you want to use the firmware provided by Linksys out of the box? Well then read on for some of the more popular options provided with the router.
** Note: Your router may have slightly different software. This article assumes you have the router connected and powered on and can access the internet. It will be much easier to configure the router if you are connected with an ethernet cable. Configuring the router with the wireless connection can be difficult and very frustrating.
1. Begin by opening your web browser to URL 192.168.1.1 or URL 192.168.15.1 - In most cases I recommend using the web interface instead of the wizard and the quick start button.
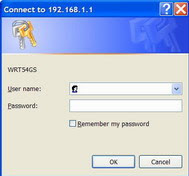
2. A login box will pop up asking for a user name and password. By default there is no username and the password is Admin. See the photo below.

The web interface may appear to be very intimidating and overwhelming, but take it one step at a time and it can be very easy. The bulk of the options you will most likely never use. If all else fails your router should work in the default configurations in order to get you connected to the internet.
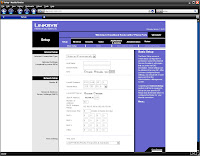
3. Once logged in you should see navigation tabs along the top. Start with the default screen.

Look for the box part way down the screen labeled 'Number of Addresses' - the default is 50 - I recommend changing it to a couple more than the amount of computers you plan to have connected to your network. It is not critical but I like knowing only a small amount of people can login to the network.
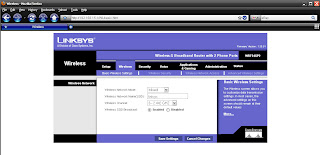
4. Next click the 'Wireless' tab. Under 'Basic Wireless Settings' change the SSID to something unique so you can remember it. The SSID is the name that appears when you connect to your wireless internet. You also have the option of Disabling the broadcast of the SSID so it does not show up in the network list. This can be very handy for security but can make it more difficult to connect to. I do recommend hiding the SSID once everything is setup and working.
Once you choose the settings click 'Save Settings'

5. Click on the 'Wireless Security' sub tab next. Choose 'WPA Pre-Shared Key' and choose a key. Make this key to be something you can remember but something people will be unable to guess. The longer you make the Key the harder to crack it will be become. This Key is essentially your password to access your network.
Click the Save Settings button at the bottom.
6. It is also a good idea to change the router access password. Click on the 'Administration' tab and make sure the 'management' sub tab is chose. From here you create whatever password you want. This is the password you enter to access this web configuration utility.
Click 'Save Settings'.
At this point you should be able to test out your wireless configuration on your router. Open your program of choice to connect to your now secure wireless network.
As always this is for informational purposes only with warranty expressed or implied. Use this tutorial at your own risk and when in doubt ask questions.
More information can be obtained about the WRT54G by visiting the Linksys website or by visiting SeattleWireless.net
Check back for more Networking articles.
NinjaCompTeam

No comments:
Post a Comment